Punk sportif (Gaëtan to his friends) wrote this guide in 2010 for kitefliers who want to learn how to fly a Revolution. He mostly mentions Revolution kites but this guide is relevant for any quad line kites similar to Revolution kites. Thanks Gaëtan!
Who is Punk Sportif?
Punk Sportif became passionate about quad line kites around 2008. He has helped many kitefliers progress and build their first kite. He also created the RDV Kite website. His contributions can still be seen on the Aufilduvent and Cerfvolantservice forums.
The rest of this page was written by Punk sportif.
Introduction
As a beginner, we’ve all asked ourselves more or less the same questions about the Revolution. I’ll try to answer them here.
I’ll start by removing one doubt from your mind: looking at others or watching videos, if you say to yourself “it’s not possible, I can’t do it like them, there must be something wrong with my kite”. The answer is “no”. Your kite is probably fine. There may be small “adjustments” to be made, but these small adjustments are nothing compared to mastery of piloting. And having tested a few, after about two years of practice, I’m not really able to feel how much better it is. So, to be able to do what they do, you have to practice, practice, practice.
Of course, I still consider myself a beginner, so this guide is far from complete. I’m just trying to share what I know, what I’ve been taught, and to answer any questions I may have had when I first started.
To the question, “Is the Revolution a good kite to start with when you’ve never done anything else?” I answer “yes”. The first few hours are not easy, but I find that the basics of flying come relatively quickly. The aim of this guide is not to be afraid of taking the plunge. The Revolution is a brilliant kite, capable of doing what no other kite can. It would be a shame to pass it up for fear of taking the plunge.
To agree on the terms used:
- Brake lines are the lines at the bottom of the handles.
- Front lines are the lines at the top of the handles.
- Pulling the fronts: mime someone drinking a beer from the neck. The gesture is virtually the same (without putting the handles in your mouth, of course).
- Pulling the brakes: mime someone spilling a beer bottle in front of them, pushing their thumb towards the horizon.
Assembling the Revolution
The Revolution consists of the sail and 5 carbon rods: 3 leading-edge rods, 2 vertical rods. The central rod in the leading edge has internal connectors/ferrules on which the two end rods are fitted. The two vertical rods are mounted behind the Revolution, not on the bridle side.
Make sure that the bridle is correctly positioned, and that the clamps do not turn on themselves.
The Revolution leading edge must be mounted facing into the wind.

The lines are attached to the Revolution bridle using lark’s head knots.
The lines are also attached to the handle leaders using lark’s head knots.
If you don’t know how to tie a lark’s head knot, you can download a video where I explain the knot here.
It’s a good idea to tie a knot scale on your handles to adjust the size of the lines (see knot scale paragraph).
Strangely enough, he doesn’t wind his lines by making 8s on his plate. I think it’s better to do so.
Parking position
In parking position, i.e. with the kite on the ground, the Revolution should be leading edge down.

In this position, the kite cannot launch by itself. I advise you to use a ground stake or a sardine or some kind of peg to block the handles so that you can launch the kite without difficulty. To do this, the handles must be blocked at the front lines, the brake lines towards the kite (as shown in Barresi’s video above).
Be careful, if you have people walking around the spot, in this position (lines stretched and handles blocked to the ground by the stake) you’re setting a trap for passers-by. The lines are hard to see, and people easily get their feet caught in them, not to mention dogs. If you’re not flying for a long time, it’s best to leave the Revolution flat on the ground, with the leading edge facing into the wind and the handles unblocked. This way, the lines will rest on the ground without tension.
Take-off
Finally, you’re ready to launch! To do this, grab the handles. With the Revolution upside down, make sure that the left and right lines cross.
For take-off, with the leading edge on the ground, pull the brake lines taut and pull backwards (or take a few steps backwards with the brake lines taut). You don’t have to be a brute. Just turn the kite right side up and put it back down again, because there are usually a few turns in the lines to be removed. Turn the handles to remove the turns in the lines. Make two turns in one direction; if there are still turns in the lines, it’s probably not the right direction. So, more or less 4 turns in the other direction. For the first take-off, make sure there aren’t any people too close to the kite, because with the turns in the lines, you may not be able to control the kite’s trajectory very well.
Once the turns in the lines are removed, you’re ready to fly. Tighten the front lines and pull (or take a few steps backwards).
Basic Revolution handling
The Revolution is a quad line kite, so it can’t be flown like a two-line kite. If you’ve already flown a dual line kite, you’ll have to forget about pulling on the arms to make the Revolution take a trajectory. The Revolution is best flown with the wrists, although later on, having one arm out of the way will allow you to make transverse trajectories or adjust the kite’s upwind grip when maneuvering.
To launch and keep the Revolution in flight, you apply tension to the front lines (this is where you mimic the gesture of drinking a beer from the neck with a beer in each hand). But the Revolution is essentially controlled by the action of the brake lines. For example, a little tension on the right brake line will turn the Revolution to the right. To understand the action of the brakes, it’s best to start by positioning the kite close to the zenith position (at the top of the window in the center) and applying small tensions on the right and left brake lines to appreciate the Revolution’s behavior.
You can also climb and descend with the revolution leading edge up. To do this, pull the fronts to go up. Pull the brakes very gently to descend. The aim is to find the right balance on each handle so that the Revolution climbs and descends in a straight line. Normally, there’s no need to pull on the arms. If the wind is constant, you just have to play with your wrists (drink a beer in each hand to go up, spill a beer in each hand to go down).
If you apply a little quick tension on the right brake and the Revolution ends up leading edge to the right and you want to maintain this trajectory, here’s the position you need to adopt:
The handles are almost horizontal and the body is slightly rotated to the left. In this body position, the left arm remains free to be moved backwards or forwards to raise or lower the Revolution, keeping it sideways. The photo above shows the influence of arm movement on the Revolution. The movement of the left arm applies tension to the upper half-wing. Depending on the tension, the Revolution moves up or down.
The opposite is true if the Revolution is turned to the left. The body will be pivoted a little to the right, and it’s the right arm that will influence whether the Revolution goes up or down.

The position of the handles is the same as if the Revolution were leading edge to the sky. However, to raise the Revolution in reverse, you’ll need to pull on the brakes instead of the front lines. Not an easy task. It’ll come in time. You just need to master the minimum amount of reverse to be able to put the revolution’s leading edge back on the ground and master the parking position. Still, if you want to avoid crashing to the ground in reverse, pull both brakes!
Here’s an exercise: lay the Revolution leading edge face down. Apply the brakes so that the Revolution launches in reverse by about 50 cm. Try to hold the Revolution in this position. If you lose hold of the Revolution in reverse, put it back on the ground and try again.
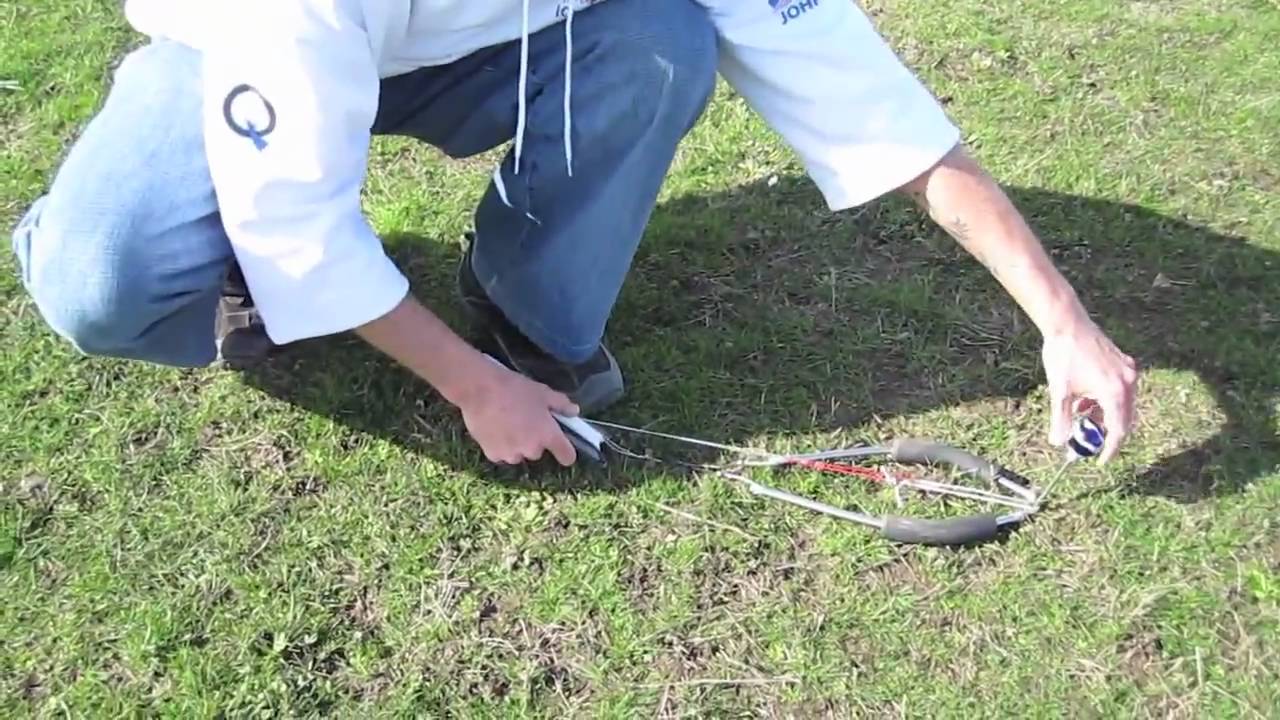
If, because the revolution is stuck, a line jammed or whatever, you have to go back to your revolution (a little walk of shame, as they say), don’t do it with your handles in hand. Your lines will twist and you’ll be in for a big untangling. Plant your handles in the ground (with the brake handles towards the Revolution) thanks to the stake you’ve kept in your pocket, and then you’re ready to go for your Revolution.


The knot ladder, also called “leader” consists of adding bridles with knots of 8 spaced about 1.5 cm apart on the handles. 4 bridles in all, 2 for the fronts, 2 for the brakes. A bridle starts with a loop for lark’s head attachment to the bridle already present on the handles, and comprises about 5 knots.
This scale of knots makes it possible to fine-tune the lines, either for a slight line unevenness, or to lengthen or shorten the front or brake lines.
In all cases, it’s best to have perfectly stretched and level lines. At first, I advise you to fly with front and brake lines of the same length. Eventually, you’ll find a setting that suits you better. Certainly by shortening the brake lines a little in relation to the front lines. In this case, you’ll just have to move the brake line attachment back on the knot scale. Your brake line size is up to you. Ideally, you should feel comfortable with your wrists when the Revolution is in the stopped position, leading edge up. You’ll need to test different settings to find the right position.
What’s certain is that brake lines that are a little shorter than the front lines make it a little easier to steer in reverse.
Choosing lines and handles
For beginners, 25 m lines are undoubtedly preferable. Lines between 40 kg and 55 kg are ideal for a Revolution 1.5. Thereafter, 36 m long lines are generally the norm for team flying. This length provides a larger window and can be an advantage in very light winds.
Line brand: laser pro gold is apparently recognized as the best. For the moment, I’ve got 25 m skylines in 55 kg. Next year, I’m buying 36 m Laser Gold Pro in 40 kg.
As for handles, it’s best to keep the standard ones at first. Longer handles are more suitable for freestyle, as they provide more responsiveness on the brakes. When you’re just starting out, you tend to make jerky movements, so long handles will increase your movements and do you no good.
Conclusion
Well, that’s a start. I hope I’ve made myself clear. I’ll add a few photos or videos to make this guide clearer. Depending on what I manage to do, in terms of practice and photo/video production, I’ll try to expand on this tutorial.
If anyone else would like to add to or correct this guide, please let me know. If you have any other questions, likewise, don’t hesitate. The aim is to make this guide as complete as possible.
In the meantime, I can only advise you to :
- Watch the Kitelife tutorial videos (some with French subtitles).
- Watch Watty’s tutorial videos.
- And take a look at Polo’s videos to get your courage up.
Thanks to all who share.
Complements
Revolution carbon rods
So there are at least 4 different sizes of rod:
- Rev 1 rods
- Rev 1.5 rods (the most commonly used)
- Bars for indoor revs (only made for this, given the thickness)
- Zen bars
I’m only going to concentrate on the rods for the rev 1.5… which has the most extensive range. The range includes :
EXP rods: these are the least expensive and the “least” powerful. They’re a hair heavier than 3wraps, and less rigid. However, they already offer a very good performance/price ratio, superior from what I’ve heard to sky-sharks.
2wraps (or professional use only): the rods sold with the full barsi, 1/2 vtd and the sul. They’re the lightest rods (12g) but also the most flexible. They hold quite well (I bend but don’t break)… within reason. That’s why they’re listed as professional use only: to prevent beginners from using too-soft rods in strong winds.
3wraps (or ultra-light): sold with a wide range of revs. They have the advantage of a very good stiffness-to-weight ratio.
4wraps (strong if I remember correctly): without the rigidity of the SLE’s 12mm rod, this is the stiffest available in 8mm.
Breeds: the best of the best. With a weight close to that of a batch of 2wraps rods (13g)… but close to the rigidity of 3wraps. The best of the best in most conditions.
travel-frame: these are 3wraps all cut in 2… perfect for holding a rev in a very small bag. It’s heaven to fit a rev in 50cm…
the SLE’s 12mm: not necessarily made for high winds… but more for stiffness lovers. The kite responds at 1/4 turn, but requires better steering to be precise. Disadvantage of course: they’re 12mm.
Questions/Answers
You can read the questions/answers on the original post of the kite service forum.
Did you like this content?
Do you like this content? Consider becoming a supporter! We’re actively looking for supporters to help us develop QuadKites.org: support our server costs, distribute our content, offer your skills…